Thursday, January 12, 2012

My first Momenta Post!!

Hi, everyone!  I'm so excited to be sharing my first projects for the Momenta Design Team! I'm even more excited that I got to play with goodies from Glue Arts, too!   This week we are doing a fabulous cross promotion with Glue Arts so you should check out the Momenta Blog for a chance to with some Glue Arts goodies!!
Both of my cards today use the super fun Kaleidoscope collection! I love the colors and designs in this line and can't wait to play more with it! For my first card, I punched 27 hearts and then stitched them together in stacks of three. The thick cardstock made each set of hearts quite heavy. So I was worried about using a tape runner for fear they would fall off the card. As soon as I put them on the card using the Glue Glider Pro, I knew they weren't going anywhere! The bond was instant and strong! I made this card several days ago and they are still just as strong as when I first adhered them. I've used a lot of tape runners, and I can tell you that this would not be the case for many of them!


For my next card, I tried a technique that I had tried before, but using the glue arts vellum adhesive, it was a whole different ballgame! This adhesive comes in a sheet and is intended for use with vellum and acrylic as it "disappears" when used so that it isn't seen through the clear embellishments. I wanted to use it for this because I would be able to cover the entire surface with adhesive easitly and it worked like a charm! I peeled it from it's backing, rubbed it onto the card's surface and then removed the protective covering to reveal the sticky surface (much like you would do with a rub-on). I then proceeded to adhere my 1/4" strips of paper in a batik design. Then, I used the U-Cut it 3-D Foam Adhesive to attach the card front to the base. The foam is nice and thick to give it lots of dimension!
I hope you've enjoyed my cards today! I know that I've really enjoyed playing with them!!

Glue Arts Products Used:
Vellum Adhesive

Momenta Prodcuts Used:
ST-4833 Kaleidoscope Sticker Kit
PK-2361 Kaleidoscope 12X12 Scrapbook Pad

Thanks for stopping by today!

Tuesday, January 3, 2012

Dear Santa....

It's time to share another layout made with the Wonder collection from Authentique.  Our sweet puppy, Duffy, looked a little too cute in front of the Christmas Tree.  So, I decided to scrap his first Christmas with a letter to Santa.  In the letter he explains that he's just a puppy and this is his first Christmas, so he's asking for forgiveness for the few naughty things he's done this year in the hopes that Santa would bring him a new bone!

Here's a closeup of the Christmas Tree adorned with some Pebbles Candy Dots (LOVE those things!).
I've been asked to do a tutorial on how to make that cool origami Christmas Tree.  I'll be sharing that on the 19th, so be sure to check it out!  Don't forget, all Authentique and Paper Smooches products are 25% off for the whole month at A Walk Down Memory Lane!  Have fun!

Thanks for stopping by!  I'll be back with more fun stuff to share in a few days!

Sunday, January 1, 2012

Jaunary is Authentique month....

...at A Walk Down Memory Lane!!  We are featuring Authentiqe and Paper Smooches Stamps this month and that means YOU get to take advantage of a 25% discount all month on all instock products from these manufacturers!

I have been having a TON of fun with Authentique products and I LOVE the projects i've made.  I know that all of the scrappy websites feature all of their Christmas goodies before Christmas.  But, I for one, don't scrap Christmas layouts until after Christmas!  I like to scrap the photos while the magic and memories are still fresh in my mind.  The Wonder line was perfect for this layout and for preserving this fabulous memory.

This photo of my daughter opening her Kindle Fire from Santa makes me smile every time I see it!

Here's a close up of the ornaments.  I don't have a die or a cricut cartridge to make these, so I used clip art that I found online to create a template in several different sizes to trace and cut out on my patterned paper.  I added some stickles and some Best Creation glitter cardstock (best stuff EVER!) to finish my ornaments.  Then, I "hung" them with some embroidery thread from my stash.

Here's a close up of the title work.  I used some Lily Bee cardstock alphas (best alphas EVER) and added some Stickles to the black Thickers to "jazz" them up a bit.

I have more projects to share, but I'm going to make you come back to see those!  Tee-hee!  Thanks for stopping by today!

Sunday, December 25, 2011

Super Exciting NEWS!

I am super excited to announce that I have been invited to join the Momenta Design Team!!

I know that there was a HUGE pool of talented designers that applied, so I really feel honored to be chosen for the team. 

Please take a moment to congratulate the rest of the team, too!

Nicole Wise

I'm so excited to get started and start sharing my Momenta Projects with you!!  Thanks for stopping by today and sharing in my excitement!  Merry Christmas!

Sunday, December 18, 2011

Ornament Card Tutorial

Here's the tutorial that I promised for the Ornament Card that I shared last night!  It looks like a lot of steps, but honestly, if I hadn't stopped to take so many photos, I'd have had the whole thing done in about 20 minutes!

To make the card/box base, all you need is a score board, bone folder, scissors, double sided tape and two pieces of cardstock cut at 7 1/4" by 8 1/2" and 4 1/4" by 6 7/8".
Working with the larger piece of cardstock first, score at 1/2", 3/4", 1 1/4" and 1 1/2".
Rotate your paper clockwise and repeat the same four score lines.

Repeat this step two more times so that you have score lines on all four sides of the paper.
Now, work on the 7/14" edge of the paper and put a score line at 2" that goes from the edge of the paper only to the last score line.  Repeat at 5 1/4".  Flip paper and to the other 7 1/4" side, as well.
You will notice, that there is a square at each corner.  Use your scissors to remove the sqaures.  Then, on the 7 1/4" sides, cut along the last, short score line up to the innermost score line.  Remove the piece that inlcudes the first two score lines only.  See photo.
Now, add double sided tape to the outer most part of each side.  Also add to the outermost part of the small tabs as shown.  DO NOT REMOVE BACKING YET!
Now, FLIP your paper so the tape side is down and fold all score lines up and toward the center of the card.  Use your bone folder to crease.
Now, doing one side at a time, remove the backing on the tape and fold in and affix tape to the inside of the card.  Be sure that the edge of the taped side lines squarely up with the innermost score line.  Press firmly to affix. 
Now, repeat on each of the three remaining sides until it looks as shown.
Carefully remove the backing on each tab and tuck them into the end of each of the long sides.
Now, turn your attention to the other piece of cardstock (the cardfront).  Place your box base facedown on to the cardstock and line it up so that the front of the cardfront will sit squarely on top of your box.  With a pencil mark where the edge of the box lies so you know where to score.
Now, score a line where you marked with your pencil and then another just over a 1/4" to the left (you want just over a 1/4" to account for the thickness of the paper).
Now, add your double sided tape to the end where you made your last score line.
Now, fold up the score lines and crease with your bone folder.  Remove the backing on the tape and affix to the BACK of the box.
Your box should now open like this:
Now, you are ready to decorate the inside of your box card.  The inset part of the card should measure 3 1/4" by 4 1/2".  By adding 1/2" strips around the frame of the box, it can help to square up anything that may have gone amiss.  I used a mishmash of Imaginisce, Fancy Pants, Best Creation and 3 Bugs in a Rug to decorate my card!  The blank white paper at the top is for my kiddos to write a message to their teacher.  I also added a small amount of re-positionable adhesive to hold the ornament in place.
And, decorate the front!
If you rotate the card to open to the left, it would be a perfect size to put in a gift card in place of the ornament!

Thanks so much for stopping by today!  I hope you liked the tutorial and I'd LOVE for you to link any versions that you make in the comments section!

Saturday, December 17, 2011

Ornament Card

I'm so excited about this card I just can't wait to share it!  Yesterday I went to Lowe's to pick up some Christmas gifts for my Dad.  Since I was actually by myself (a rarity!) I took a few minutes to browse some things I didn't need.  I spotted a "teacher" ornament that immediately became something I DID need!  So, I picked up one for each of my kids' teachers and then went on to find a few more things I "needed." 

Once I got home, I decided that I needed (there's that word again) to craft something scrappy to use as a holder for these ornaments.  The word "box card" kept ringing in my head.  So, I set about the internet looking for just the right tutorial to match the vision I had.  Nothing came close.  So, out came the paper and pencil and I decided to figure it out.  At one point, somewhere around the 5th template, my daughter remarked, "Mom, scrapping is kind of 'mathy,' isn't it?"  Yes, dear for those of us who are anal-retentive, it most certainly is.

So, here it is on about the 7th try, and I really like the results.  I plan to make a tutorial tomorrow-- or maybe even tonight since my afternoon coffee is still going strong.  But here it is:

When you see the front, it looks like just a pretty Christmas card:
Then, when you open it... SURPRISE!
The white paper at the top is for one of my cherubs to write a note to their teacher.  Upon closer inspection, you will see that there is a "frame" that goes around the card to create an inset for the ornament.  It's 1/2 inch wide and a 1/4 inch deep.  The edges are actually folded over and in to make it work:

I'm really excited about how this came out.  It would be a great holder for a gift card, too!  I'll be back soon with a tutorial-- I promise!  Thanks for stopping by!

Saturday, December 10, 2011

My Sketch World Blog Hop!


Calling all card sketch lovers! We’ve asked our designers to choose their favourite Lucy Chesna card sketch and challenge their partner to show you ways to create wonderfully inspiring cards, each with their very own a twist!  Our international designers on this hop are:
My Sketch World 
Jan Tatomir 
Karen Zabuska
Lisa Moen
Lucy Chesna
Marion (Majo) Wybraneitz
Nicole Wise
Sherri Priest
Stacey Wright
The details:
1. Visit each blog and leave a comment.  Read carefully, there maye be individual requirements as some desingers are offering little prizes of their own!
2. After you have visited each Designers blog come back to My Sketch World blog and let us know what you thought. Part Two of the hop ends Monday, December 12th, 11:59 EST.
3. Everyone who posts a comment on each blog will be entered to win a TEN DOLLAR GIFT CERTIFICATE to A Walk Down Memory Lane! Winners will be randomly chosen.
4. To receive and additional entry, scraplift a card and link it back to the My Sketch World blog and tell us in your comment what inspired you!
5. Have fun! Be inspired!

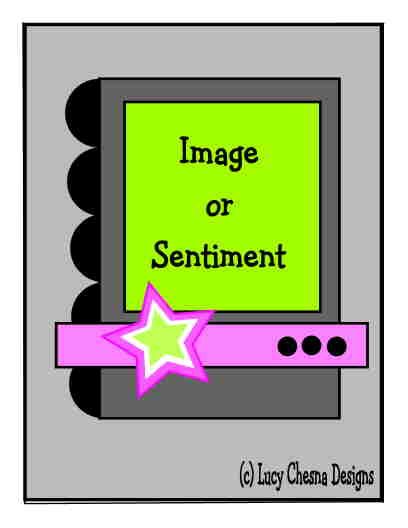
My sketch was picked my Lisa Moen and her "twist" was that I had to use ink, paint or Copics.   Here's the sketch she gave me:
And, here's the card I created based on the sketch:
I decided to use the Copics option of Lisa's twist and used a red one to create the tiny dots around the outside of my card.  I love the dimension and interest that they added to an otherwise very simple card.  I used Bella Blvd.'s Christmas Wishes Papers, an SRM Sticker and an OLD Making Memories leaf/brad combo that's been in my stash for a LONG time!

I hope you enjoyed my part of the MSW Blog Hop!  I'd love it if you became a follower on my blog so that you can come back and visit often! 

Be sure to head to Sherri's blog next to continue on.  And, don't forget to leave a comment on each blog along the way so that you will be eligible to win the AWDML Gift Certificate!

Friday, December 9, 2011

Wishing You a Furry Woofmas!

Today, I want to honor some of the furry friends in our lives-- the dogs!  Every dog loves a treat and every dog-lover appreciates it when you remember their canine companions.  So today, I made a cute treat bag with home made peanut butter dog treats inside.  The project even includes the recipe so that your totally-impressed-dog-loving-friend can make homemade dog treats, too!  They are incredibly easy and my dogs LOVE them!

But first the scrappy project!  Here is what it looks like closed:

 And, when they untie the ribbon and open it up, they will see the homemade dog treats and the recipe, too!

This project was created for A Walk Down Memory Lane's 12 Days of Christmas event on their blog.  Please check out the post to see the directions for creating this treat bag!

And if you are interested in the recipe for the dog treats, here it is!
2 Cups Whole Wheat Flour
1 tsp Baking Powder
1 Cup Skim or Low-Fat Milk
1 Cup Peanutbutter
Mix flour and baking powder in a large bowl. Add milk and PB and stir until blended into a dough. Roll out onto a lightly floured surface about 1/2" thick. Cut with cookie cutter or with a pizza cutter into small shapes. Bake on a lightly greased cookie sheet at 350* for 20 minutes. Turn oven off and leave cookies in the oven for an additional 10-20 minutes so they get nice and crispy. Cool completley and store in a bag or airtight container for up to 3 weeks.

Thanks so much for stopping by today!  Be sure to come back this weekend for more scrappy fun!!

Thursday, December 8, 2011

Spread some Holiday Cheer!

I am so excited about this card!!  I was cruising around on the web and was fascinated by a tutorial that I came across on Splitcoast Stampers where you create a herringbone pattern using several different patterns cut into thin strips.  So, I gave it a whirl with some Scrappin' Sports & More papers and I am thrilled with how it came out!

I kept the rest of the card very simple because I couldn't bear to cover up the fun pattern!
Thanks so much for stopping by today!  Come back soon for more scrappy fun!

Saturday, December 3, 2011

Reindeer Food!

Every year the list of Christmas Eve traditions seems to get longer. We put out cookies and milk for Santa, hang Santa’s Key on the door, enjoy a visit from the “Jammie Elf,” read “‘Twas The Night Before Christmas,” track Santa on NORAD’s website… the list goes ON! One of the favorite things we do is to sprinkle Reindeer Food in the driveway so Santa’s Reindeer will have a snack while they wait for Santa and the glitter helps them to find where to land! This tradition started whent the kids (who are now 8 and 9) were in preschool. They made the food there, and anonther Christmas Eve tradition was born!


I decided to make fun containers for our Reindeer Food. Usually it’s just in a sandwich bag, so this is way more fun! I used some of SRM’s plastic tubes and some of Bella Blvd’s fun new Christmas line to make these!


This project was created with goodies from A Walk Down Memory Lane for the 12 Days of Christmas going on on their Blog.  Check out the AWDML blog for directions on how to make this project and the new sales that are on for each day of the 12 Days of Christmas!!

Also be sure to check out this month's featured manufacturer's at AWDML: Bella Blvd and StampingScrapping!  They are both 25% off for the whole month of December!

Thanks for stopping by today!