Tuesday, February 18, 2014

Tuesday Technique: Doily Dresses!

Thanks for stopping by!  Here's a post that I have on the BOAF Blog today....

Hey there, everyone!! It's Tuesday and here at BOAF, that means it's time for a tutorial!

One of my favorite elements of this kit is the sweet little doilys! They are so dainty and cute! I wanted to make one of those little doily dress cards that I've seen on Pinterest, so I decided to figure it out.

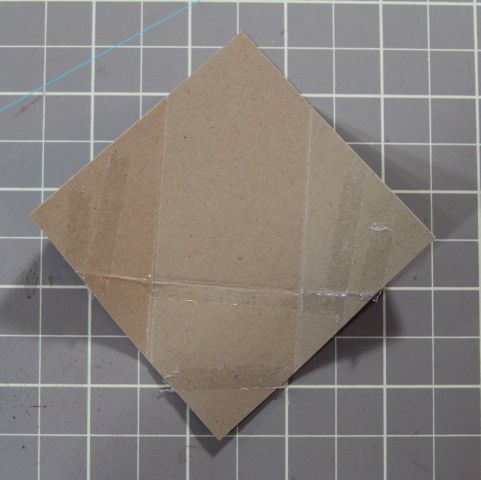
First, start with your doily face down and fold it almost in half:

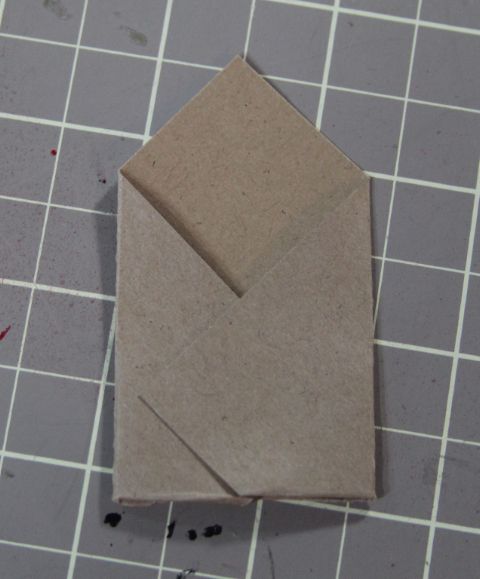
Now fold one third of the doily over:


Fold the third on the other side over and adhere it down.
 
 
Fold the point down and adhere it:
 

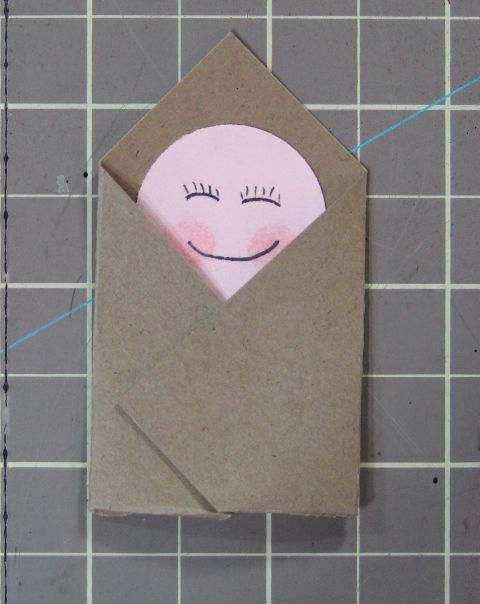
Now, make the top of your dress. Adhere a doily to a piece of cardstock. I used white, but a color might look cool, too. You need to do this because the doily won't punch well without it. Once it's adhered to the cardstock, cut it with a heart punch.


Now, use a little adhesive to stick the bottom of the dress over the bottom of the heart as shown.


Now, add a color "belt" to hide where the two pieces together. Most of them I've seen done with ribbon, but I wanted red and didn't have a thin enough ribbon, so I used some patterned paper from the kit and a sweet little red flower that's from the kit, as well.


Now, your dress is done, just add it to your project! I wanted to keep my card really simple so that the focus stays on the sweet little dress. I used some of the little wooden pieces from the kit extras for the sentiment. I dabbed a little white paint on them so they would match a bit better. The gold pieces in each corner are from the gold thickers that are available as kit extra, as well.


Thanks so much for stopping by tonight! I hope you enjoyed my tutorial and that you're inspired to try one for yourself! If you don't have your February kit yet, there's only ONE left! Hurry if you want to make it yours!

Sunday, February 16, 2014

Loving the BOAF February Kit!

Hey there, everyone!! Here's the post I have up on the BOAF Blog today!

 I'm so excited to finally share my first projects with the incredible February kit! It's so full of incredibly beautiful papers and embellishments! I wouldn't call it a Valentine theme... I'd call it a LOVE theme! I've really enjoyed cutting into it and playing!


Usually I share my layout first, but today I want to share my card first! I knew that I really wanted to feature one of the awesome doilies, so I started with one of those as my center. Then, I added a few layers and used one of the sweet wood pieces from the extra embellishments as my sentiment. I dabbed a little pink ink on it to make it match the card a bit better. I love that the card has so much dimension and that it can be used for a number of different occasions (wedding shower, valentine, baby girl...).


And now for my layout. I wanted to create a layout with another of the photos of my grandparents. We estimate that this photo was taken around 1959 or 1960. I love how the black and white photo works with the pinks and reds of the papers. Oh, and I used the sketch that is part of one of the challenges of our crop that's going on right now!


Here's a closeup of the center portion of the layout. The flower is from last year's February kit, I believe! I love how the blingy swirls work with it. I acutally cut the swirl in half and added a space in the middle of it (under the flower) so that it would work better with the size of the flower. You can see that I also used another fabulous doily!


I am loving this kit so far! I can't wait to dig back in and keep on playing! Thanks so much for stopping by and don't forget to check out our crop! There's still time to play along. You can find all of the details HERE.

Looks like there's only ONE kit left in stock! Just click HERE if you want to make it yours! Don't miss out!

Thanks so much for stopping by my blog today!

Wednesday, February 5, 2014

Welcome Baby Avery!

Here's a fun post that I shared on the AWDML Blog last week!  Check it out!

Happy Scrappy Wednesday, Everyone!
We have some very exciting news in our family! My cousin and his wife welcomed baby Avery into the family just yesterday. We are over the moon in love with her, and we haven't even met her yet!
Now that's she's here and we know her name, I wanted to make a special card to send to them. Look how cute it is!


To make the baby bundle, I started with a 3 inch square of kraft cardstock. Then, I placed it on my scoring board. I placed one corner at the 3" mark and made sure that the opposite corner was also on the 3" line. Then I made a score line 3/4" on either side of the 3" mark.

Now, turn the square 90 degrees and make one score line 1/2" to the left of the 3" mark.

Next, fold on each of the three score marks and add adhesive to each flap as shown.

Now, fold in the flaps and press to adhere.

Now, use a 1" circle punch to make a small light pink circle. Draw on a face and use some ink or chalk to give the face some pink cheeks. Then, simply tuck the face into the little bundle.

Now, add the baby bundle to your card! I decided to add some twine and a tiny little tag with the baby's name on it, as well.
I hope you liked today's project and that you're inspired to give it a try the next time you are lucky enough to be able to welcome a baby.

Thanks so much for stopping by today!