Showing posts with label Gift. Show all posts

Wednesday, December 18, 2013

We Wish you a Merry Kissmass....

Hey, everyone!  Thanks for stopping by today!  Here's a fun post I shared last week on the AWDML Blog as part of their 12 Days of Christmas event.

Happy Scrappy Wednesday, everyone and welcome to day 11 of our 12 Days of Christmas event! I have a fun and simple project to share today that would make a great gift for teachers, classmates, office friends, postal carriers, bus drivers and anyone else that you like to give a little "something" to every Christmas.

Start by printing the sentiment on your printer. You can use any word processing program and it should end up being about 2" by 3". The sentiment I used was "We wish you a Merry Kissmas and a Chappy New Year."

Now, cut a piece of patterned paper to 3 1/2" by 4 1/2". Using a craft knife, cut two 1 1/2" slits that are 1 1/4" from the top and bottom edge and about 1/4" from the left edge. See below. The RED represents the cuts.


 Once your slits are cut, simply slip your tube of chapstick in and adhere your sentiment.


You can leave it simple as you see above, or you can dress it up a bit more like this....


I hope you enjoyed today's project that you're inspired to make a few gifts!

All of the products for this project are available at A Walk Down Memory Lane!

Thanks so much for stopping by today!

Wednesday, November 13, 2013

Snowman Popcorn Gift

Hey, Everyone!  Here's my post from last week on the AWDML Blog!

Happy Scrappy Wednesday, everyone! Just popping in (hahaha!) to share a fun (and easy!) gift that would be great for teachers, office staff, neighbors or even party favors at your holiday shin-dig! A Snowman Popcorn Wrap! That's right-- I simply created a snowman that wraps around a bag of microwave popcorn!

I started with some white cardstock that was approximately 6" X 12". Depending on the brand and size of popcorn you use, yours may need to be taller or shorter. Then, I simply put the package of popcorn in the middle and folded my paper around it and ahdered it in the back to create a sleeve. Then, I slid the popcorn out while I made his face.

The scarf is simply paper with a fringe cut from scissors with some added twine and a heart. The face is made from a carrot cut from a scrap of orange cardstock, some red ink sponged on and a black pen. I stamped a simple, general sentiment on there, as well. You could add buttons instead of a sentiment, if you wanted!

Here's my little guy:

Isn't he SO cute?!?! There's lots of fun ways you could change this up and maybe even use it for something besides popcorn. I think this would make a great card front!

I hope you enjoyed my project today and that you are inspired to make one of your own! Thanks for stopping by today!

Be sure to check out A Walk Down Memory Lane for all of the products used to make this project!

Wednesday, August 21, 2013

My Notes

Hey, there everybody!  Thanks for stopping by today!  Here's the project that I shared last week on the AWDML blog!

Today I have another super easy project that is incredibly versatile and can be used for tons of different occasions! I'm making a notebook for my daughter, but it could be a teacher gift, a mini-album and lots of other things!

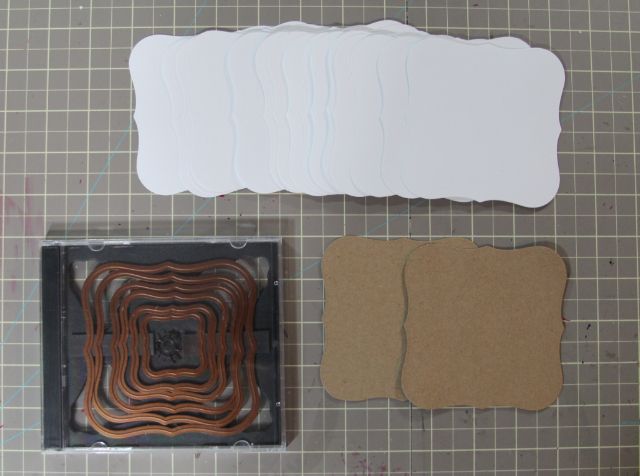
First I cut a front and back using my largest die from the Nestibilities Labels One set and Kraft cardstock. You could make this with lots of different shapes and dies! Then, I cut 15 pages using white cardstock and the same die. Why 15 pages, you ask? Because that's how many scraps of white cardstock I had! (This is a fantastic job for a kiddo who is "dying" to scrap with you!)
 
**Note: Check out my Spellbinders Storage system-- an empty CD case and some sticky magnet strip. Pretty genius, eh?

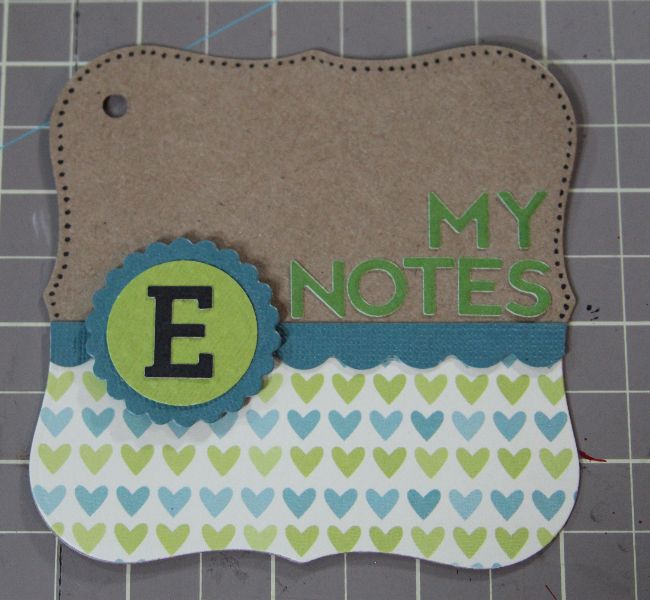
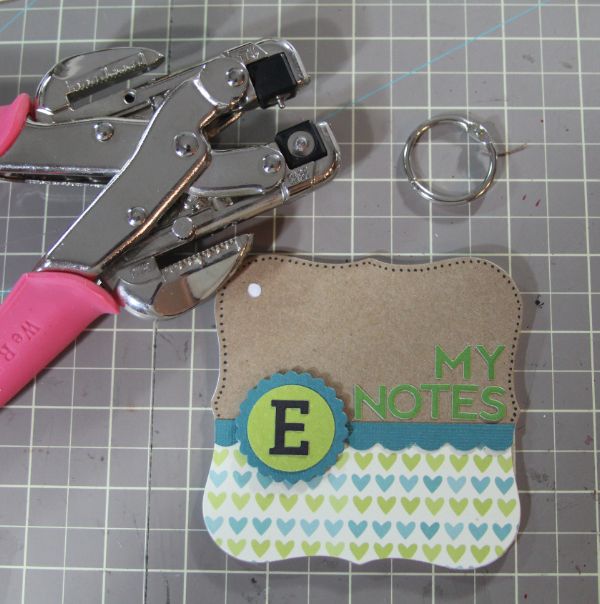
Next, I decorated the cover of my book and cut a hole using my crop-a-dile for the book ring.

Now, I needed to cut a matching hole for each of my pages. Because I was using the crop-a-dile, I could cut several pages at once. So, I lined the pages up carefully and used the hole in the cover as a guide to cut the rest. I did about 3 pages at a time until I'd cut a hole in each. Then, I fed the book ring through the hole.

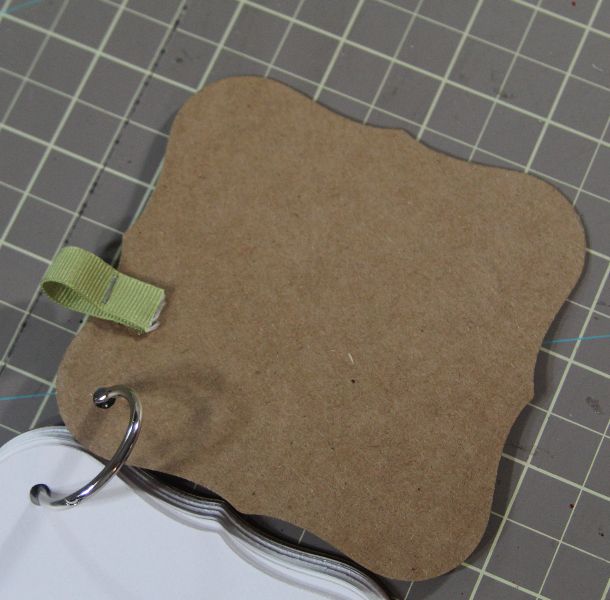
The last step was to create a simple loop for the pen! I cut a piece of ribbon and wrapped it around the pen. Then I secured ith using the tiny attacher so that it was the right size. Then, I trimmed the ribbon and used some super strong adhesive to adhere it to the back of the front cover.

Then, simply slide the pen into place and the project is done!!
 

I can picture this for SO many uses-- a journal, a coupon book for Mom (free hugs, empty the dishwasher, etc.), a teacher gift, a mini-album, shopping lists... anything!

I hope you enjoyed today's project and are excited to try one for yourself! Thanks so much for stopping by!