Showing posts with label Altered Items. Show all posts

Wednesday, November 13, 2013

Snowman Popcorn Gift

Hey, Everyone!  Here's my post from last week on the AWDML Blog!

Happy Scrappy Wednesday, everyone! Just popping in (hahaha!) to share a fun (and easy!) gift that would be great for teachers, office staff, neighbors or even party favors at your holiday shin-dig! A Snowman Popcorn Wrap! That's right-- I simply created a snowman that wraps around a bag of microwave popcorn!

I started with some white cardstock that was approximately 6" X 12". Depending on the brand and size of popcorn you use, yours may need to be taller or shorter. Then, I simply put the package of popcorn in the middle and folded my paper around it and ahdered it in the back to create a sleeve. Then, I slid the popcorn out while I made his face.

The scarf is simply paper with a fringe cut from scissors with some added twine and a heart. The face is made from a carrot cut from a scrap of orange cardstock, some red ink sponged on and a black pen. I stamped a simple, general sentiment on there, as well. You could add buttons instead of a sentiment, if you wanted!

Here's my little guy:

Isn't he SO cute?!?! There's lots of fun ways you could change this up and maybe even use it for something besides popcorn. I think this would make a great card front!

I hope you enjoyed my project today and that you are inspired to make one of your own! Thanks for stopping by today!

Be sure to check out A Walk Down Memory Lane for all of the products used to make this project!

Wednesday, November 6, 2013

Halloween Treat Boxes

Hey, everyone!!
Here's a post I shared last week on the AWDML Blog (before Halloween!).  Thanks for checking it out!

Happy Scrappy Wednesday, Everyone!

Today I have some fun (and easy!) Halloween Treat Boxes to share with you! These would be perfect for whipping up a large batch for your kidI did three different designs, but they all started the same:
First, cut a 3" by 8 1/2" strip of cardstock. I used black. Then, score it at 3", 4" and 7". Fold on all of the score lines and then you'll have this:


And the front....

 
Now, the fun part-- to decorate the front! For this one, I used my oval dies to create a little pumpkin, I hand cut the stem and the "curly Q" is just a thin strip of cardstock that's been wrapped around a pencil. Cute, eh?


Here's little Frankie! I simply hand cut the "fringe" for his hair, used a small circle punch for his eyes, and drew the rest with a black marker!


I also created a ghost at the last second, but forgot to snap a photo just of him. I started with a 3" by 3" square of white and hand cut the shape of the ghost. Then circle punched the eyes and mouth using two different sized circle punches.

Here are all of the treat boxes together. When I attached the "characters" to the fronts of the boxes, I only put adhesive on the top 1/3 so that they would stick only on the top flap of the box. So, if you lift up on the character, the box will open to reveal the Halloween treat inside!

I'm already cooking up a Christmas version of this project! Stay tuned for that! Thanks so much for stopping by today! I hope you enjoyed the project!

Wednesday, September 25, 2013

Mason Jar Lanterns

Hey there, peeps!  Here's a fun tutorial I shared on the AWDML Blog last week!

Happy Scrappy Wednesday, everyone! Mason Jar crafts are all the rage right now and today I want to share how to make some Mason Jar Lanterns!! This is a great project to involve the kids on, too!

Check this out!


First I started with my quart size mason jars, mod-podge and food coloring. You'll also need a plastic spoon and paper plate for each jar you plan to make.


First, put about 3/4" of Mod-Podge into the bottom of your jar.


Now, add your food coloring. To make Orange, we used about 6 drops of red and 6 drops of yellow.


Use a plastic spoon to stir the food coloring into the Mod-Podge. Keep stirring until it's totally blended. Any streaks left will cause streaks on your jar. The color should be a pastel version of the color you are after. The color will darken up and it will dry in the color of your food coloring since the Mod-Podge turns clear when it dries.


Now, turn your jar on its side and gently roll it back and forth to distribute the colored Mod-Podge evenly throughout the inside of the jar.


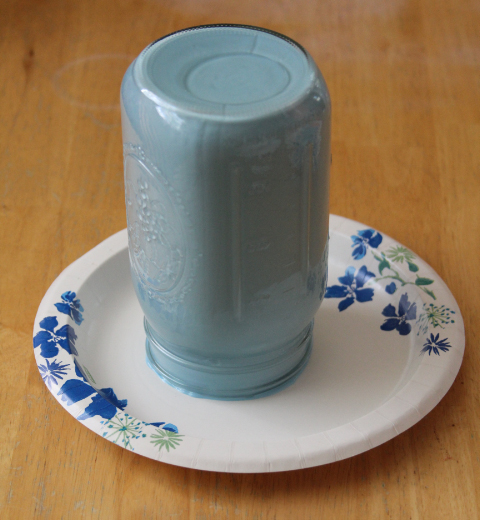
Empty out any excess and then turn your jar upside down on a paper plate. I learned that it takes a LONG time to dry this way. And, I ended up putting two chopsticks across my paper plate and setting the jar on top of them so that the air could circulate.


Here's what they look like when they are dry! Isn't that COOL?! OK, I'm not going to lie. The top of the jar is a little messed up because I tried to be impatient and turn them back upright to dry. It didn't work. But, I had a plan on how to cover that up! ;)


I decided to turn the orange jar into a jack-o-lantern by adding a pumpkin face to it using black cardstock.


The blue jar has a winter theme so, we added snowflakes to the outside.


I think the blue jar would be pretty with a garden/flower theme, too!

I love how these Mason Jar Lanterns came out and will be using them around our house for seasonal decorations. I can't wait to see what other designs I can come up with! We'd love to see what designs YOU can come up with! Share them on our Facebook page so we can ooh and aah over them!

Wednesday, July 31, 2013

Perpetual Birthday Calendar!

Hey, everyone!  Here's a fun post that was shared on the AWDML blog last week!

This week, I have birthdays on the brain! I always feel like I'm going to forget someone (and often do...), so I wanted to have something that would be a quick reference to know when everyone's birthday is. I created a perpetual birthday calendar. You can use it year after year and just add people as you go!

I started with a 5"x7" acrylic free standing frame that you can get from any department or craft store. I batted my big brown eyes and got my husband to drill two holes in it. Each hole is 1" from the outer edge and 1/2" from the top.


Then I created my cover. I wanted it to be festive and fun, but something I could keep out on my desk year round. I found this great cherry paper in the Echo Park Perfect Summer collection and then used up some of my Thicker stash for the letters. I punched the cover 1" from the outer edge and 1/2" from the top to match the acrylic frame.


Next, I created the pages that I fill in the birthdays on. They are simple, yet functional. Just print, punch and go! I created mine using Word and saved it as a PDF file. You are more than welcome to download it HERE.


I connected all of the pages using book rings and I'm ready to start filling in the birthdays of all my friends and family! I'll never miss another birthday! Here it is all put together, ready to sit on your desk or mantle all year!


Now, simply flip the over over to any month you need and see who has a birthday that month!


I hope you enjoyed today's project and that you're inspired to make one of your own! 

Thanks so much for stopping by today and be sure to check out AWDML for all of the latest in scrapping goodies and all of the supplies used to make this project!

Sunday, July 28, 2013

Altered Cans Project

I'm working on getting caught up on all of the blog posts that I haven't shared this month.  Even though this is a 4th of July project, this could be made for any party or event-- just change up the paper you use!

Today I’m sharing a fun project that would be perfect for your 4th of July picnic table, but can be changed to suit any occasion!
 
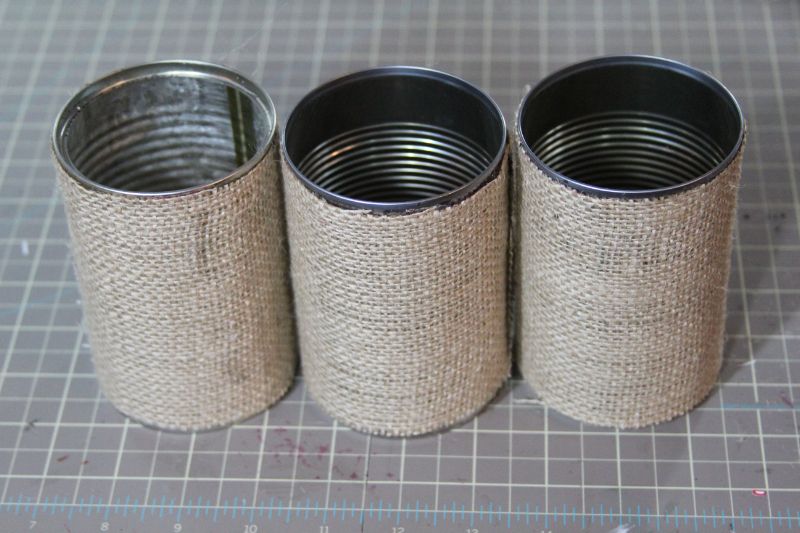
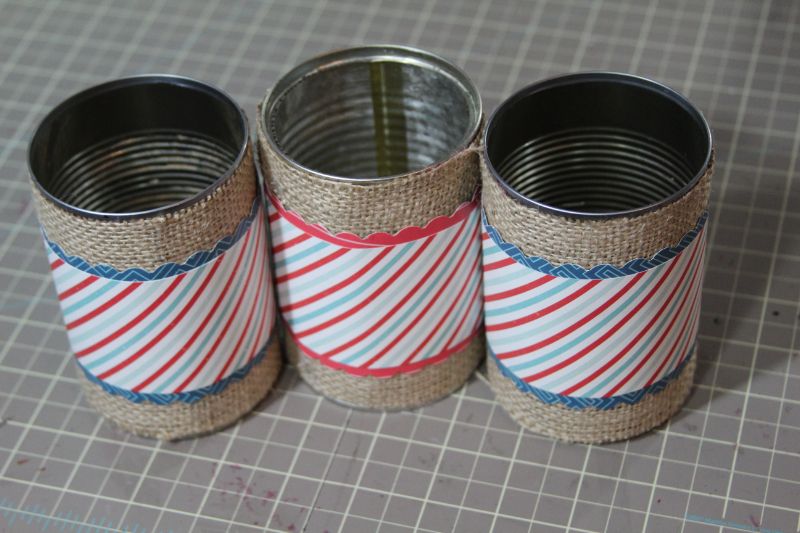
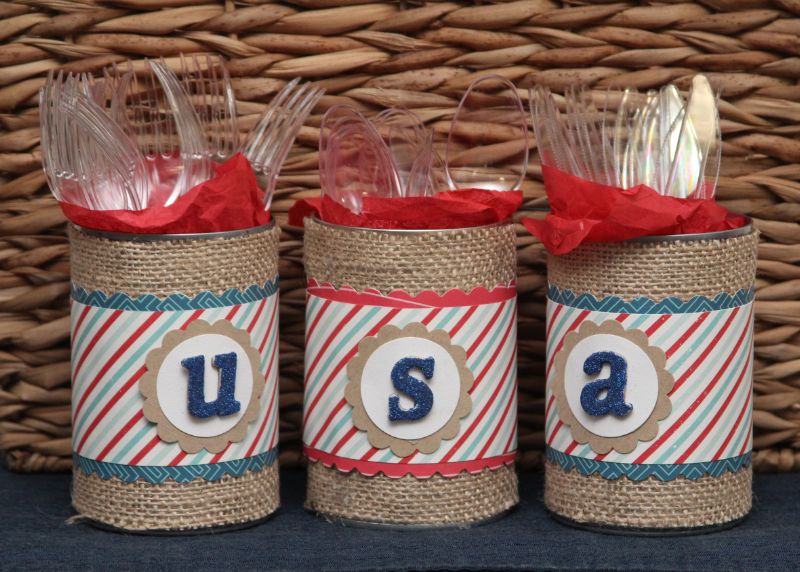
I started with three cans from the recycle bin. I think these are actually two cans of refried beans and some mandarin oranges! Then, I covered them in burlap fabric. These cans measured 4″ tall and 9 1/4″ around. I tried a few different adhesives, but I found that hot glue worked the best for me.


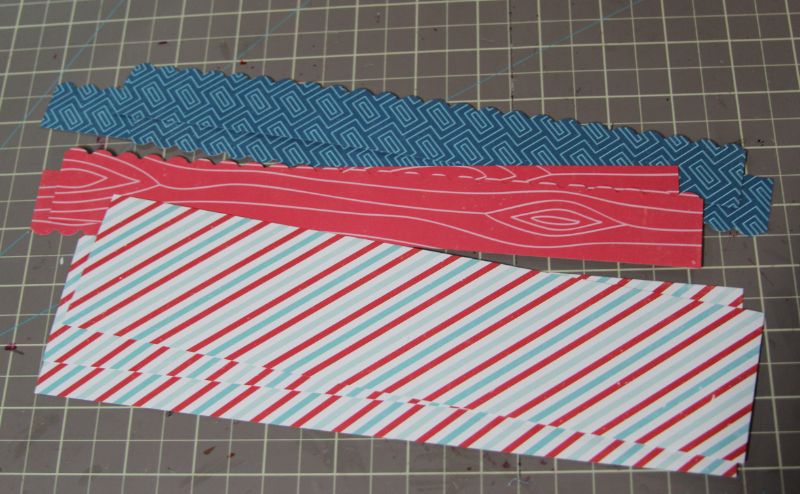
Now, I cut three strips of paper that were 2 1/4″ by 10″ and punched three smaller strips that were also 10″ long.


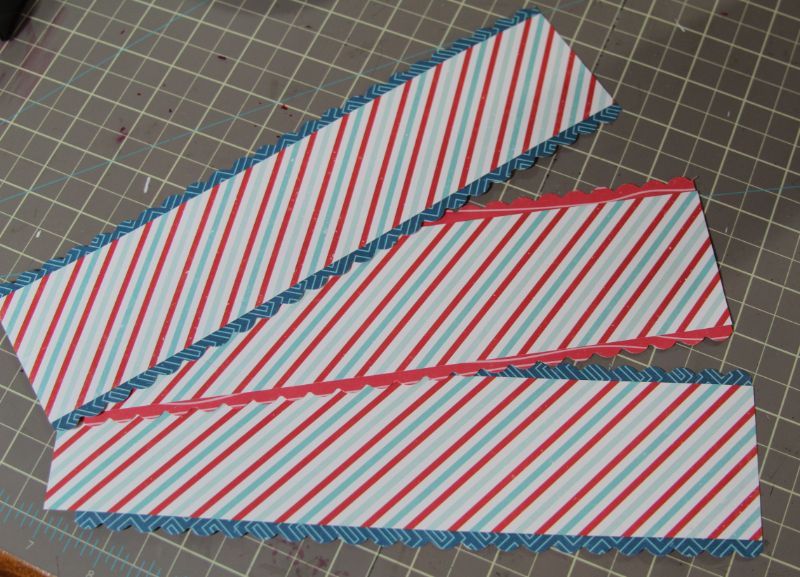
Next, using my ATG gun, I attached my punch strips to the back of the 2 1/4″ strips, like so:


Now, using the hot glue gun, I adhered these strips to my cans.


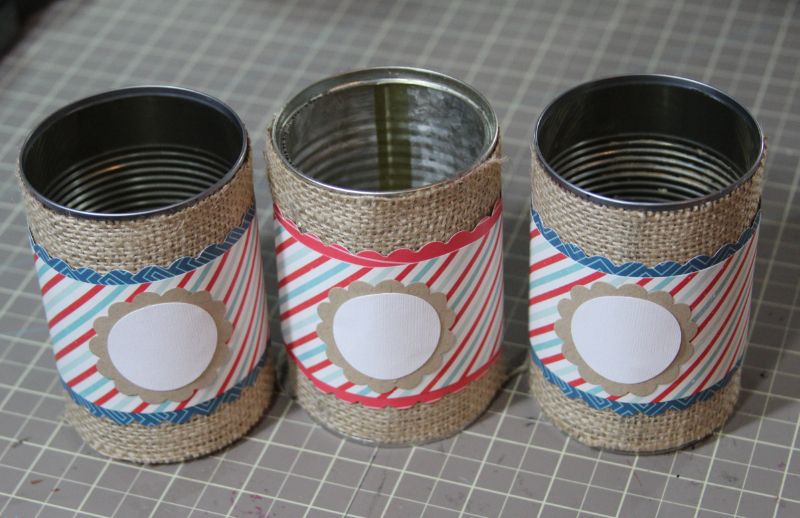
Next, I punched three scalloped circles from kraft paper and three circles from white cardstock. I glued each white circle onto a scalloped circle and then adhered them to the cans.

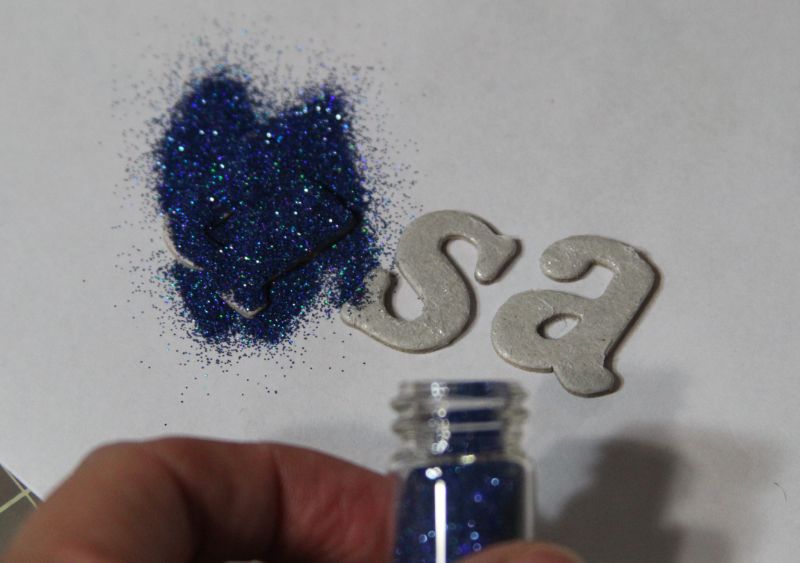
Now, to add some sparkle, I decided to glitter some chipboard pieces. To do this, I ran my chipboard letters through my Xyron FACE DOWN so that the glue is on the FRONT of the letter.

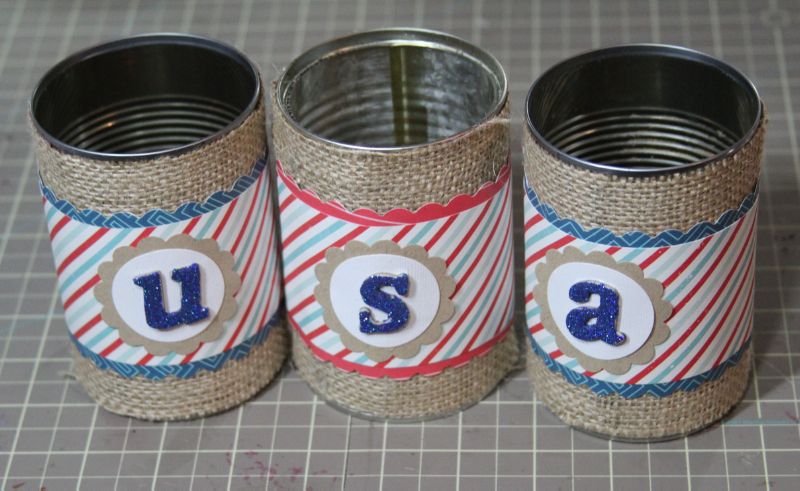
Next, I used my finger to press gently on the glitter to make sure it stuck and then picked up each letter and shook off the excess glitter. I usually tap it gently on the table to get all of the loose glitter off, as well. Then, I glued the letters on the front of the cans.

Finally I added some coordinating tissue paper and put in the plastic silverware that we’ll use at our 4th of July picnic. You could also add decorated pretzel sticks, pinwheels, lolipops, or anything that fits the occasion you are celebrating!
I hope you enjoyed today’s project and that you’ll consider trying this for your next party!


Thursday, June 20, 2013

Easiest Gift Card Holder EVER!

Hey there, everyone!  Here's a project I shared on the AWDML Blog last week!  Enjoy!

Gift Card season us upon us– Father’s Day, Graduations, Baby Showers, Weddings and Birthdays. Every occasion calls for a gift and in every case Gift Cards are simple and loved. But, there’s always the question of how you present the gift card. Well, I have a super simple and easy gift card holder that is perfect when you have several to make at once and not a lot of time to do it! And, the greatest part, you can make THREE of them from just one piece of 8 1/2″ by 11″ piece of cardstock!

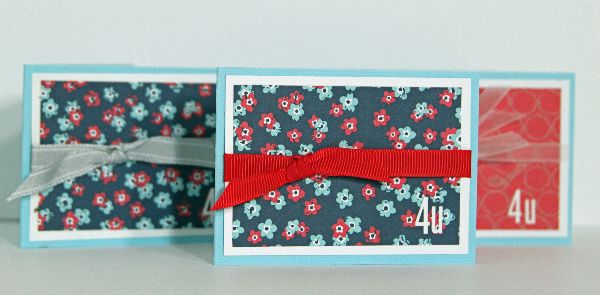
Here’s what we’re making:

First, cut your cardstock into three strips that are 2 3/4″ by 11″. There will be a tiny strip left over. You can just put that in the recycle bin!

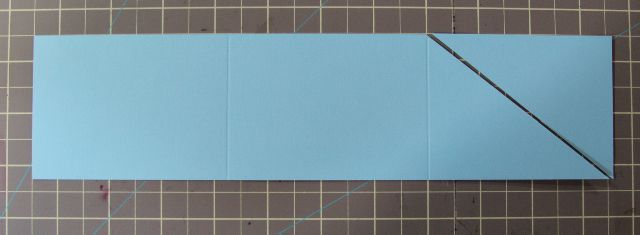
Now, using your score board, score each strip at 3 3/4″ and 7 1/2″.


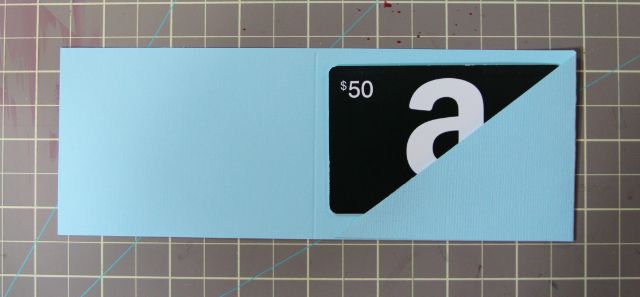
Now, cut corner to corner on the third panel (the furthest right in the photo above), which is slightly smaller than the rest.


Now, apply adhesive along the bottom edge of the now triangular panel where I marked with a pen below.


Now simply fold the triangular panel over and press down to adhere. This makes the pocket for your gift card.


Once you fold your card on the final score line, that’s IT! No kidding! Isn’t that the easiest thing EVER?! Now, you just need to decorate it!

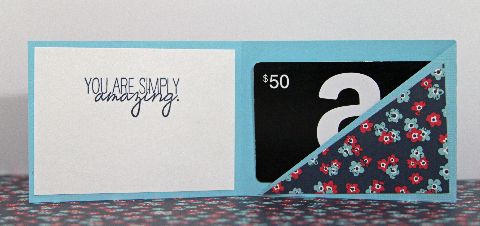
I cut two white pices at 2 1/2″ by 3 1/2″ and two patterned paper pieces at 2 1/4″ by 3 1/4″. I put one white piece and one patterned piece together for the front of the card. I stamped my sentiment on the other white piece and adhered it to the inside left of my card. Finally, I cut the 2nd patterned paper piece from corner to corner to fit on the triangular flap.

Here’s the front of one of the cards:


And, here’s the inside:

I hope you liked today’s project and that you will find it useful when you have gift cards to give this summer!

Monday, February 25, 2013

My First Altered Canvas: Love is all we Need

I know, I know... I'm still on the Valentine's kick.  But, I made this for the AWDML Blog last week and I just HAD to share it here with you!  I bought this canvas a while ago to do a gift for my dad's birthday.  And...well....I haven't got the nerve to get all goopy and create what's in my mind (sorry, Dad!). 
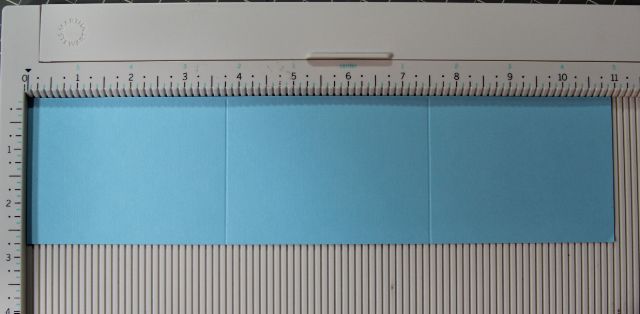
So, I was inspired by a Pinterest project that originated from the American Crafts blog and created this!  All I needed was my cricut, a circle punch, some glue and this beautiful Authentique paper!
You can see how I created the heart on the AWDML Blog post.  And, if you come to my house, you'll see this hanging in my scraproom!  I just love how it came out and I can't wait to do another canvas.  Maybe this time I'll do my sweet friend Scarlett proud and get my goop on!  Stay tuned!

Tuesday, February 19, 2013

Paper Bag Pocket Tutorial

Hey, all! Welcome back to my blog!  I know I have been a bit of a slacker with updating lately, but that's all about to change!  I'm on vacation and I plan to schedule a bunch of posts to get you all caught up on what I've been up to! 

Today, I want to shar a fun and easy tutorial that I shared on the Birds of a Feather Kit Club blog! I love this project because it can be used for a ton of different things-- birthday party or wedding favors & goodie bags, Christmas treats for friends or co-workers, May Day treats for friends and neighbors, Teacher Appreciation gifts and so much more! I chose to make a Valentine goodie bag for my kids using the BOAF February 2013 kit!
First, start with a basic paper lunch bag:

Now, simply fold the bottom half of the bag up, leaving about an inch and a half of the top of the bag showing and crease.


Next, simply stitch around the three sides of the bag to create your pocket. If you don't have a sewing machine (or don't want to dig it out), you could use a bead of glue or some double sided tape here, instead.

Now, the base of your project is done (yep- it took about two minutes!) and you can decide from here where you want to go. This can be used for just about anything! Today, I'm using it for a Valentine goodie bag for my kids. This would even be easy enough that you could make one for each of their classmates! Here's what mine looked like after it was decorated:


And, here it is full of goodies and ready to make someone smile! Isn't it super cute?!


Thanks so much for stopping by today. I hope you liked my project and that you can think of ways that you can use it!

Before I sign off, I just want to take a moment to thank Amy for having me on this fantastic team. This has been an incredible experience and I have been so very honored to be a part of it. I also want to thank Linda who has been a wonderful team leader and an inspiration with her designs. And, Kristin who has been a perfect team mate- also an inspiration! And, of course I want to thank the BOAF girls for welcoming me into the family! I'm not going anywhere and hope to stick around as long as you'll have me!

Stay tuned to the BOAF Blog for the announcement of the AWESOME new Design Team and for details about the upcoming crop! It's going to be a great time!

Thanks, again, everyone!!

Thursday, August 30, 2012

Momenta and Helmar!


Hey, everyone!  I'm on the Momenta Blog today sharing a fun project using Momenta AND Helmar! We are in the throes of getting ready for back to school here and I wanted to make a fun and easy project for the kids' teachers to give them at open house. As a teacher myself, I know how much it means when a student brings a gift and that it's always a huge bonus when the gift is useful!

So, I started with a 4"x6" acrylic picture frame and inserted a fun piece of Momenta paper matted w/ matching cardstock. Then, I put another piece of patterned paper at about 3 1/2" x 3 1/2" matted with cardtock on top of the acrylic. I normally worry about adhering paper to acrylic, but not this time- with the Helmar tape runner, I had no doubt that it would stay put!

I added a ribbon and secured the bow with some Helmar 450! Then added the "just a note" stamped cardstock and simply peeled the backing from the sticky notes and stuck them right down. When the sticky notes run out, the teacher can just put a new pad right where the old one was- so it's re-fillable! The kids wrote a note to their teacher and I stuck that to the back and the project is done and ready do be delivered at open house next week!

Here's a front view of one of them:


And, here is a side view! You can see how it will sit easily on the teacher's desk without taking up too much room, ready to be used!


And, here they are for their group photo! One for each teacher!


Thanks so much for stopping by today! I hope you are enjoying the Momenta & Helmar event as much as I am!

Helmar Products Used:
Quick Fix Permanent Adhesive Tape Runner
450 Quick Dry Adhesive

Momenta Products Used:
#17374- Doodle Floral 6x6 Coordinating Cardstock Pyramid Pad

Thursday, August 2, 2012

More August Kit Fabulous-Ness!

I have a confession to make...
Before I got my August Kit from Birds of a Feather, I had never tried Washi tape! I know, I know... I'm the last scrapper on the planet to try it. But, it's safe to say that I'm officially hooked!

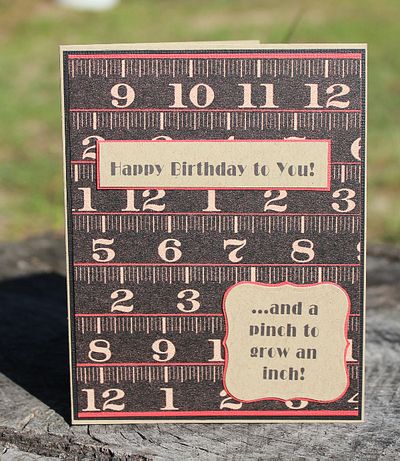
I loved the tape that looks like a ruler! It will be great to use on school pages and lots of great projects to come. But, I wanted to try it on a card! Here's what I came up with- a masculine birthday card! It's simple, but fun!

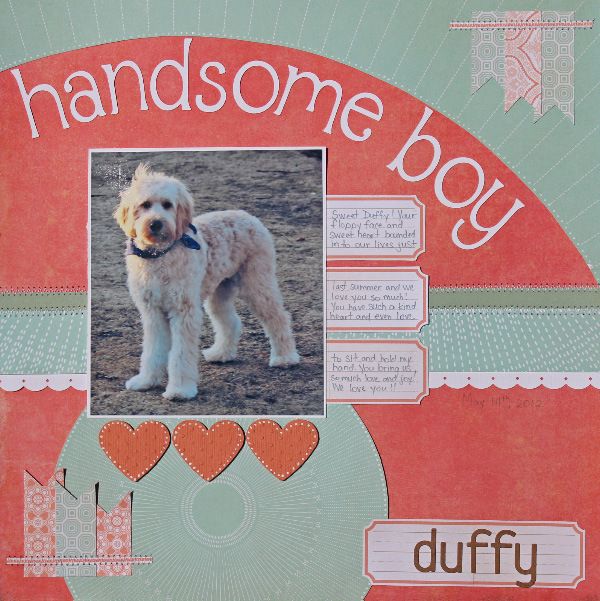
And, no month will be complete without at least one project that revolves around my sweet (and slightly naughty) Duffy. The photo was taken on his 1st birthday, May 14th.

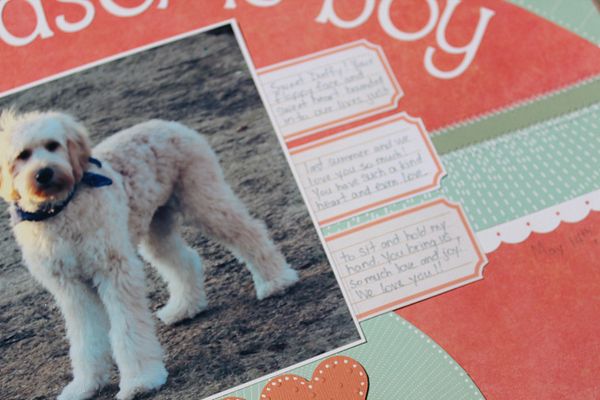
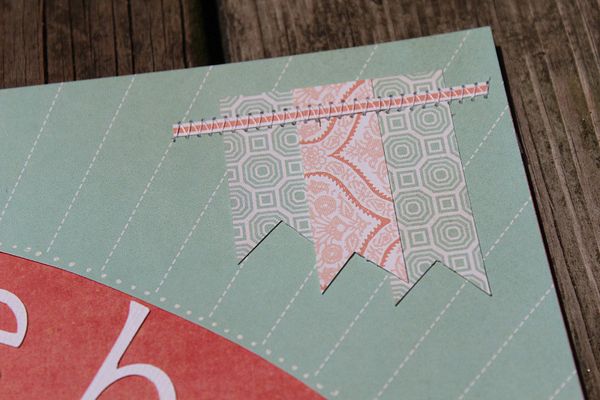
I loved cutting out the little journaling pieces from one of the papers and using them not only for the journaling, but for the subtitle where I put two of them together! The banner flags are made from the leftover pieces where I cut the journaling pieces.

Aren't the little journaling spots cute?

And, I love the colors and patterns in the scrap pieces left over after cutting out the journaling pieces! They were perfect to make the flags from!

Thanks so much for stopping by today! Be sure to come back and visit for more yummy projects from the scrap chicks!
~Nicole