Thursday, August 30, 2012

Momenta and Helmar!


Hey, everyone!  I'm on the Momenta Blog today sharing a fun project using Momenta AND Helmar! We are in the throes of getting ready for back to school here and I wanted to make a fun and easy project for the kids' teachers to give them at open house. As a teacher myself, I know how much it means when a student brings a gift and that it's always a huge bonus when the gift is useful!

So, I started with a 4"x6" acrylic picture frame and inserted a fun piece of Momenta paper matted w/ matching cardstock. Then, I put another piece of patterned paper at about 3 1/2" x 3 1/2" matted with cardtock on top of the acrylic. I normally worry about adhering paper to acrylic, but not this time- with the Helmar tape runner, I had no doubt that it would stay put!

I added a ribbon and secured the bow with some Helmar 450! Then added the "just a note" stamped cardstock and simply peeled the backing from the sticky notes and stuck them right down. When the sticky notes run out, the teacher can just put a new pad right where the old one was- so it's re-fillable! The kids wrote a note to their teacher and I stuck that to the back and the project is done and ready do be delivered at open house next week!

Here's a front view of one of them:


And, here is a side view! You can see how it will sit easily on the teacher's desk without taking up too much room, ready to be used!


And, here they are for their group photo! One for each teacher!


Thanks so much for stopping by today! I hope you are enjoying the Momenta & Helmar event as much as I am!

Helmar Products Used:
Quick Fix Permanent Adhesive Tape Runner
450 Quick Dry Adhesive

Momenta Products Used:
#17374- Doodle Floral 6x6 Coordinating Cardstock Pyramid Pad
Sunday, August 26, 2012

My First BOAF September Kit Reveal!!

Hi, everyone! I'm super excited to share my first two projects created with the Birds of a Feather September kit! The kit is chock full of gorgeous colors and beautiful patterns... and don't forget the fantastic embellies!

First I want to share my a layout about my sweet girl who just turned ten. I can't believe she's officially in "double digits"!! Where did the time go?!?! I swear it was just weeks ago that I brought my sweet little red-headed bundle home for the first time praying that I didn't drop her. And here she is- she's about to head into 5th grade and she's just all kinds of wonderful!

I used a few different techniques on this layout-- all of my edges are inked and I colored the alpha stickers with a combination of Copic Markers. I also cut apart the pearl swirl/butterfly that is part of the "extras" and used the swirl with the flower, the butterfly separately and even put a few single pearls on the tag that hangs below the photo. The journaling strips are made using the backs of the tags that I inked with "Antique Linen" Distress Ink and then ran them through my printer.

Here's a closeup where you can see how I separated the pearl embellishment.

I also want to share this fun and simple card with you. To create the 3-D hearts, I simply punched three hearts, stacked them one on top of another and ran them through my sewing machine. Then, I just bent them at the middle to create the dimension. It's a fun technique to use with lots of different shapes, but hearts are my favorite!


Last I knew, Amy still had some September Kits available-- but only a few! So, be sure to swing by the botique and pick yours up now before they are gone!

Thanks so much for stopping by today!

Monday, August 20, 2012

I Love my Sweet Boy!

Hey, there everyone!  It's time to share another layout with you! 

Last week, I had to post a tip or technique on the A Walk Down Memory Lane Blog.  My tip was two fold- (1) Don't be afraid to use a photo where the subject is off to one side and (2) go ahead and run your page elements right on to your photo.  Doing that helps to connect your photo to the rest of the page and gives it a great sense of flow.  To really illustrate my point, I put my title right on the photo!

For this one, I used Echo Park's "Boys" mini-Collection.  I just love how the collection works with a black & white photo!


And, here's a close up of the title work. 

Thanks so much for stopping by today!  I hope you were inspired to try something new!

Saturday, August 18, 2012

Let's Hang Out...with Gizmo!

**If you are here for the Momenta & Clearsnap Blog Hop, please scroll down to the next post.  Thank you for stopping by!**


Today is my final August reveal with the Birds of a Feather August kit and I've saved my favorite project for last! Not only is the paper beautiful, but the embellishments are wonderful, too! I loved the little clothes hangers but wasn't sure what to do with them. Then, I remembered this tutorial for origami dresses and I knew just what to do!

I had to use a bone folder to really crease the paper at each fold because the paper is so wonderfully thick. I used my computer and printed the sentiment directly on the kraft paper.


And for my last layout, I took some photos of my parent's sad, sad yorkie, Gizmo. He seemed so broken hearted that my mother had "abandoned" him at our house. He stared so sadly out the window from the back of the couch that I had to take some photos!
I used the packaging for the alphas that are in the kit for the green background behind the photos.


Here's a closeup where you can see where I popped up several of the hearts with foam tape.


I have SO loved working with this kit! The colors and patterns were right up my alley and it's been a blast to play and share with you this month. Just wait to see what Amy has in store for you next month!! ;)

Thanks so much for stopping by today!

Friday, August 17, 2012

Clearsnap and Momenta Blog Hop!


Welcome to the Momenta & Clearsnap Blog Hop!!  If you arrived from Megan Aaron's blog, then you are in the right place!  If not, jump back to the Clearsnap Blog so you can start at the beginning and not miss any of the scrappy goodness along the way!

You have a chance to win two prize packages each valued at $30.00!

 All you have to do to be eligible to win is visit the participating blogs on the hop and leave a comment on each one! Of course, we would love to have you follow our blog, too!

Deadline to leave a comment to win is 11:59pm (ET), Sunday 8/19.

Winners of the Clearsnap prize will be announced on the Momenta Blog on Monday, 8/20/12!

Here's one of the prizes you can win!

Now, onto my project!  I used the super fun Design Adhesive to create this fun card!  I cut the balloons and birthday hats out of the centers and just used the circle designs and some white embossing powder to create the background.  Then, I embossed one of the whole designs onto the green paper and stamped the sentiment using some of the Clearsnap Mix'd Media Inx.


Here's a closeup of the design so you can see the great texture and pop that you get when you emboss these great designs!


These Clearsnap products were so fun to play with!  The Design Adhesives were really fun and I can't wait to try some of the other designs.  And, the Mix'd Media Inx was awesome!  The inkpad was nice and juicy and stamped a clear, precise image perfectly on the first try!  Thanks, Clearsnap!


Clearsnap Products Used:

Momenta Products Used:
#17374- Coordinating Cardstock Pyramid Pads 6X6- Doodle Floral

Thanks so much for stopping by today!  Don't forget to leave a comment to be eligible for the Momenta and Clearsnap Prizes!  Now, hop over to Denise Hahn's Blog to keep the fun going!

Wednesday, August 15, 2012

This is what HAPPY looks like!

Sometimes, I create a layout and just stand back and smile.  This is one of those times. 

Meet Daniel.  He's the happiest, sweetest, cutest little guy ever and we had a blast hanging with his family at the lake this summer.  He had been dumping buckets of water over his own head and then screeching with delight before doing it again.  That's when I snapped this photo.  It just makes me smile.

This layout was originally featured on the A Walk Down Memory Lane blog, but I had the honor of also having it featured on the Echo Park blog when I won the Facebook Fan Friday contest by posting it on their Facebook page.  All of the papers and stickers on this page are from the Echo Park A Boy's Life collection.


Here's a closeup of the title work.  I love running my titles or other page elements onto the photos.  It helps to connect the photos to the rest of the page.

And, here's the sun and some of the fun sticker elements I used.  The clouds are from a MFT Die-Namics Die.

And here's the journaling.  I love to use journaling strips and almost always mat them to help them pop off the page.

A special thanks to Jen & Derek for letting me share their sweet little boy with you all!

Thanks so much for stopping by today!  Be sure to stop by on Friday for a fun blog hop!

Tuesday, August 14, 2012

I Love You THIS Much!

Hey, everyone!  I've got another project with the Birds of a Feather August Kit today!  You can go to the BOAF Blog to see a little tutorial on a technique I used to make this.

One of my favorite things in this kit is the Washi Tape!  I LOVE that it's black and that it looks like a ruler and I REALLY love that I have lots of it left!  It's going to be great for teacher cards and school themed projects! 

Meanwhile, here's a layout featuring my boy.  There is a little letter to him in the kraft envelope that he will be able to open up and read one day. 

Thanks so much for stopping by today! I'll be back in just a few short days with my final reveal with this kit-- I hope you'll come back to see!

~Nicole


Thursday, August 2, 2012

More August Kit Fabulous-Ness!

I have a confession to make...
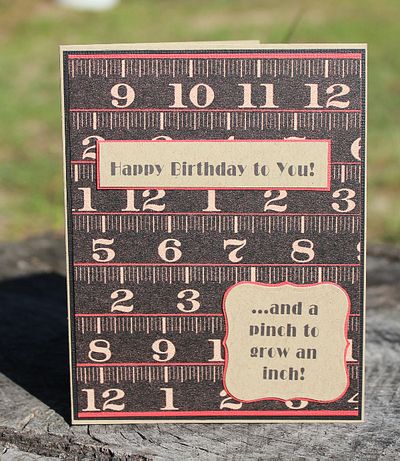
Before I got my August Kit from Birds of a Feather, I had never tried Washi tape! I know, I know... I'm the last scrapper on the planet to try it. But, it's safe to say that I'm officially hooked!

I loved the tape that looks like a ruler! It will be great to use on school pages and lots of great projects to come. But, I wanted to try it on a card! Here's what I came up with- a masculine birthday card! It's simple, but fun!

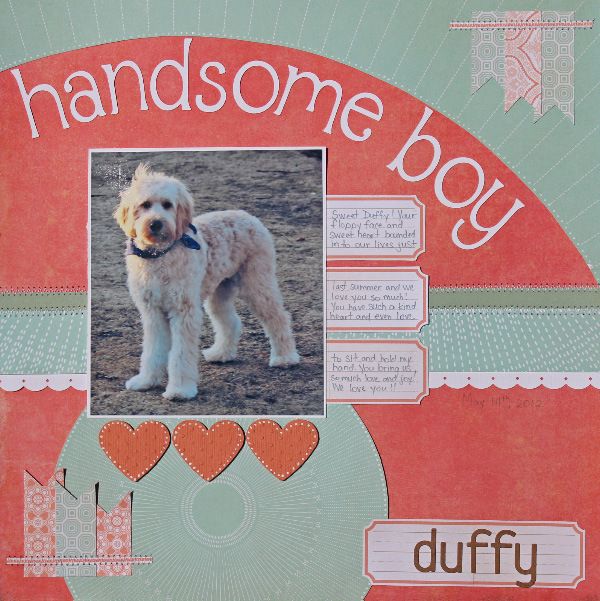
And, no month will be complete without at least one project that revolves around my sweet (and slightly naughty) Duffy. The photo was taken on his 1st birthday, May 14th.

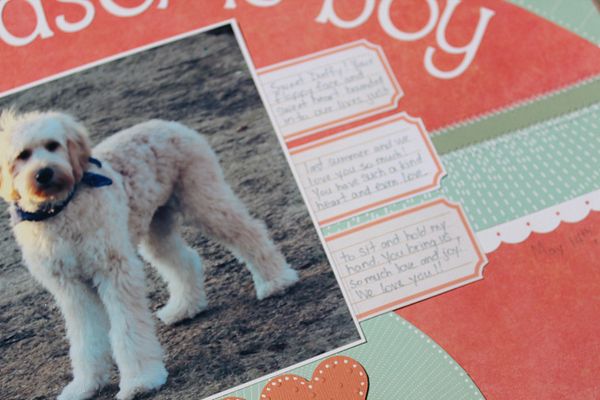
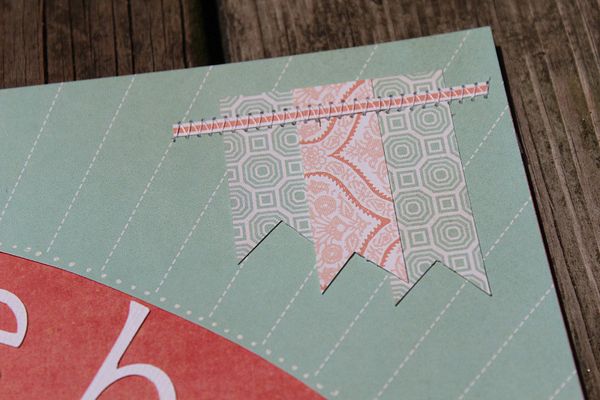
I loved cutting out the little journaling pieces from one of the papers and using them not only for the journaling, but for the subtitle where I put two of them together! The banner flags are made from the leftover pieces where I cut the journaling pieces.

Aren't the little journaling spots cute?

And, I love the colors and patterns in the scrap pieces left over after cutting out the journaling pieces! They were perfect to make the flags from!

Thanks so much for stopping by today! Be sure to come back and visit for more yummy projects from the scrap chicks!
~Nicole